The easiest way to deploy your project to your XM Cloud instance is manually via the Sitecore Cloud Portal. If you go to the XM Cloud Deploy dashboard, you can not only create projects and environments, but also start a “Build and deploy” process for a specific environment. While that might seem convenient and perfectly okay to do, it doesn’t really fit in a proper deployment strategy where you would want to script both the infrastructure provisioning as well as the application deployments to create a fully automated, repeatable and robust deployment process.
If you want to have a little more control, you can opt for starting a deployment via the CLI from your workstation. The Sitecore Command Line Interface is a command-line tool that lets you perform different tasks against your Sitecore instance, of which the Cloud command is one: https://doc.sitecore.com/xmc/en/developers/xm-cloud/the-cli-cloud-command.html. This command has several useful subcommands that help you manage your Sitecore XM Cloud projects, and starting a new deployment requires only one command:
dotnet sitecore cloud deployment create --environment-id <id> --upload --working-dir <path>Although you now have more options and control, it still is not desirable to run this manually from your development workstation. But we can use this CLI command in our pipelines and build a decent deployment process that fits well into the bigger picture of our deployment strategy (we have multiple pipelines for multiple applications within our landscape, from front-end to individual microservices).
Don’t reuse the deployment command
As you probably already know when reading this blog post, there’s a hierarchy to XM Cloud environments. A “Project” defines as the top-level entity, containing multiple “Environments”, usually at least two non-production environments (like test and acceptance or UAT) and one production environment. When you start a deployment, you always deploy to a specific environment: as you can see in the above example, the cloud deployment command takes a (required) parameter named --environment-id.
While this implies that you can use that deployment command to deploy to each environment of your XM Cloud project individually, that isn’t the way to go!
Script-wise it is very easy to use the above deployment command to deploy to each of your environments, only passing the corresponding environment ID into the pipeline and you’re good. But for a decent deployment strategy, I would go the extra mile of utilizing the build promotion mechanism that is built into XM Cloud.
Promoting deployments
Why?
There are two important reasons to promote an existing build to other environments instead of creating a new deployment per environment:
- Saving time: promoting is even quicker than deploying as it skips the build step
- Guaranteed the same build & version, which is important for a representative (acceptance) test preceding a production deployment, ensuring a proper DTAP process
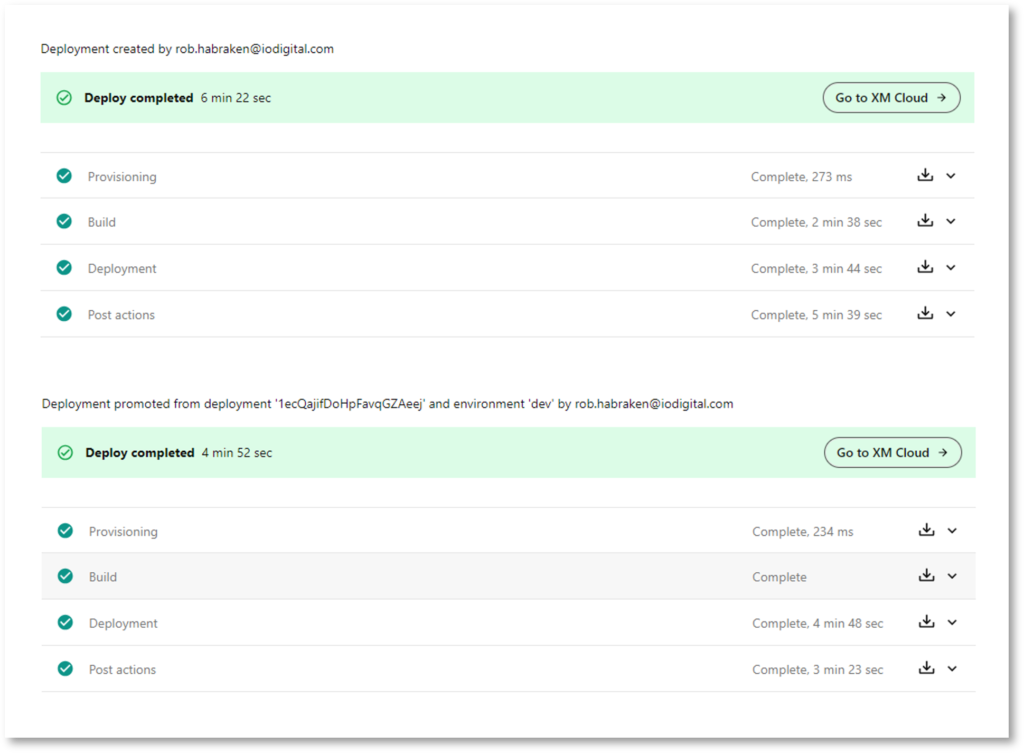
When you check out the deployment logs in the Sitecore Cloud portal you can see promotion skips the build step (as it is re-using the same build), saving about 25% of the initial deployment time:
The mechanism
When you are using the CLI you need to take the following steps to be able promote your builds:
- Create a deployment without starting it (using the
--no-startoption) - Retrieve and store the deployment ID
- Execute a
cloud deployment startcommand referencing the ID - When you want to promote your build to another environment, use the
environment promotecommand with the deployment ID as input for the--source-idoption
If you would start your deployment right away, as shown in the above example, you won’t retrieve a deployment ID and thus are not able to promote that build using the CLI (of course, you can always do that via the Sitecore Cloud portal but that’s not what we’re after).
The promote command
While promoting deployments is a deployment in way, this CLI command actually isn’t a subcommand of cloud deployment but of the cloud environment command. This makes it less apparent when you are creating a deployment script using the deployment command as a guide in the documentation. The environment command is used to create, update and list environments, but also promote a build from one environment to another: https://doc.sitecore.com/xmc/en/developers/xm-cloud/the-cloud-environment-command.html#the-promote-subcommand.
Storing and passing the deployment ID
So, the theory is quite simple. But getting the YAML pipeline to actually return and store the deployment ID using powershell steps to execute Sitecore CLI commands is a bit of a challenge. Thanks to my colleague Rinus Leenders for figuring out the works, we can now share our fully scripted deployment pipeline for Azure DevOps in YAML. We are utilizing the ##vso[task.setvariable] command, which is a special syntax recognized by Azure DevOps environments, informing the system to set a variable accordingly.
This leads to the following PowerShell script to store the deployment ID in your pipeline when creating a new deployment:
$deployment = dotnet sitecore cloud deployment create --environment-id $env:XMC_ENVIRONMENT_ID --no-watch --no-start --upload --working-dir $(Build.SourcesDirectory) --json | ConvertFrom-Json
Write-Host "$deployment"
$deploymentId = $deployment.id
Write-Host "##vso[task.setvariable variable=deploymentId]$deploymentId"
Write-Host "##vso[task.setvariable variable=deploymentId;isOutput=true]$deploymentId"
After which we can use that variable to start the deployment right away:
dotnet sitecore cloud deployment start --deployment-id $(deploymentId) --json | ConvertFrom-JsonAnd subsequently promoting that build to another environment as part of the deployment pipeline to our acceptance and production environments (encompassing more parts and pipelines, as we simultaniously and / or individually would want to deploy our front-end and microservices as well, but that’s outside the scope of this blog post):
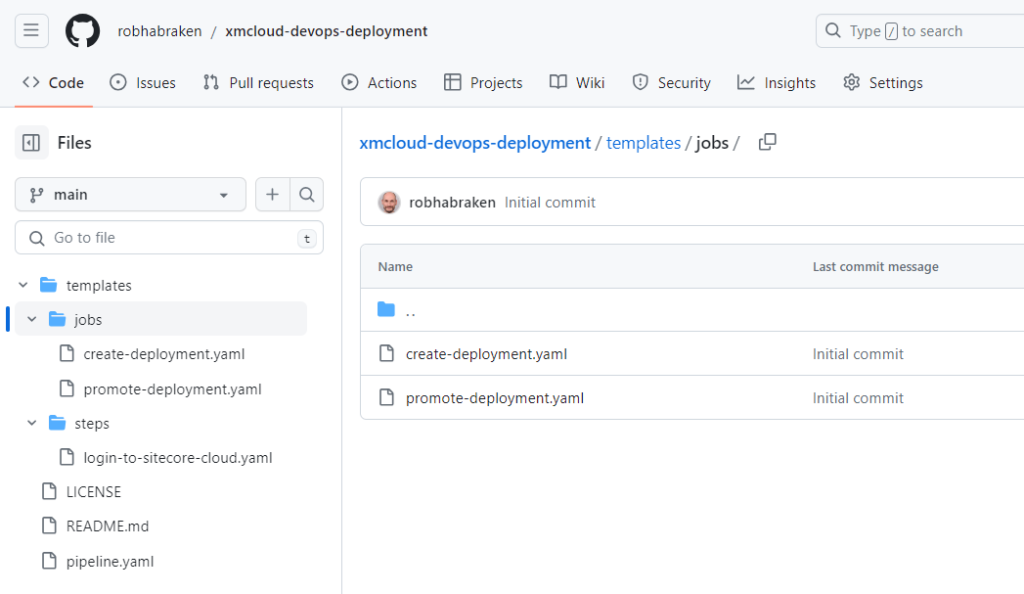
dotnet sitecore cloud environment promote --environment-id $env:XMC_ENVIRONMENT_ID --source-id $(deploymentId)I have shared the full YAML pipeline for Azure DevOps on my GitHub account over here: https://github.com/robhabraken/xmcloud-devops-deployment. It contains separate templates for both the deployment creation as well as the deployment promotion steps. Feel free to use this as a starting point for your own deployment pipeline in Azure DevOps and share your input via a Pull Request or an Issue if you have a suggestion or improvement.